How do I install a muffler clamp?
Oct 06, 2025
Leave a message
Hey there! I'm a supplier of muffler clamps, and I know how important it is to get that installation right. In this blog, I'm gonna walk you through the process of installing a muffler clamp step by step. Whether you're a DIY enthusiast or just looking to save some bucks on a repair, this guide is for you.
Why Muffler Clamps Matter
Before we dive into the installation process, let's talk a bit about why muffler clamps are so crucial. A good - quality muffler clamp helps to keep your exhaust system in place. It prevents leaks, which can not only be noisy but also dangerous as exhaust fumes contain harmful gases like carbon monoxide. If your exhaust system isn't properly clamped, it can lead to rattling noises, poor performance, and even damage to other parts of the exhaust system over time.
Tools You'll Need
First things first, gather the necessary tools. You won't need a whole bunch of fancy stuff, just the basics:
- A socket wrench set: This is gonna be your best friend for tightening the bolts on the clamp.
- A torque wrench: It's important to tighten the bolts to the correct torque, and a torque wrench will help you do that.
- A pry bar (optional): Sometimes, the old clamp can be a real pain to remove, and a pry bar can come in handy.
- Safety goggles and gloves: You don't want any debris getting in your eyes or your hands getting dirty, right?
Step 1: Prepare Your Vehicle
Park your vehicle on a flat, level surface and engage the parking brake. Make sure the engine is cool before you start working on the exhaust system. If you've just driven the car, give it at least an hour or two to cool down. Exhaust components can get really hot, and you don't want to burn yourself.
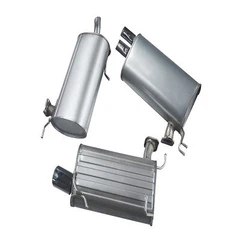
Step 2: Locate the Muffler and the Old Clamp
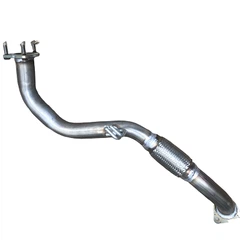
Crawl under the vehicle and find the muffler. The muffler is usually located towards the rear of the car, and it's a large, cylindrical component. The old clamp will be around the joint where the muffler connects to the exhaust pipe. It might be a bit rusty or dirty, but you should be able to spot it easily.


Step 3: Remove the Old Clamp
Use your socket wrench to loosen the bolts on the old clamp. If the bolts are really tight or rusted, you might need to spray some penetrating oil on them and let it sit for a few minutes. Once the bolts are loose, remove them completely. If the old clamp is stuck, you can use a pry bar to gently pry it off. Be careful not to damage the exhaust pipe or the muffler while doing this.
Step 4: Clean the Joint
After removing the old clamp, take a wire brush and clean the joint where the exhaust pipe and the muffler meet. Remove any rust, dirt, or debris. A clean joint will ensure a better seal when you install the new clamp.
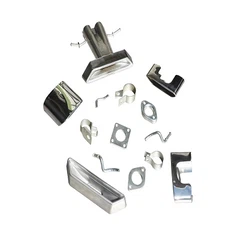
Step 5: Choose the Right Muffler Clamp
As a muffler clamp supplier, I know that choosing the right clamp is super important. You need to make sure the clamp has the right size and type for your exhaust system. Measure the diameter of the exhaust pipe and the muffler to ensure a proper fit. There are different types of muffler clamps, such as U - bolts and band clamps. Make sure you pick the one that's suitable for your application.
Step 6: Install the New Clamp
Place the new clamp around the joint between the exhaust pipe and the muffler. Align the holes in the clamp with the holes in the exhaust pipe and the muffler. Insert the bolts through the holes and hand - tighten them.
Step 7: Tighten the Bolts
Now, it's time to use your torque wrench. Tighten the bolts to the manufacturer's recommended torque. Over - tightening can damage the clamp or the exhaust components, while under - tightening can lead to leaks. Refer to the instructions that came with your new clamp for the correct torque specification.
Step 8: Check for Leaks
Once the bolts are tightened, start your vehicle and let it run for a few minutes. Listen for any hissing sounds, which could indicate a leak. You can also visually inspect the joint to see if there are any signs of exhaust fumes escaping. If you find a leak, you might need to re - tighten the bolts or check if the clamp is properly aligned.
Other Related Parts
If you're working on your exhaust system, you might also be interested in other parts like Muffler Bracket, Exhaust Pipe Hanger, and Catalytic Converter Cone. These parts play important roles in the overall performance and stability of your exhaust system.
Conclusion
Installing a muffler clamp isn't rocket science, but it does require a bit of attention to detail. By following these steps, you can ensure a proper installation and a leak - free exhaust system. If you have any questions about choosing the right muffler clamp or need more information about our products, feel free to reach out. As a reliable muffler clamp supplier, we're always here to help you with your exhaust system needs. Whether you're a professional mechanic or a DIYer, we've got the right products for you. So, don't hesitate to contact us for all your muffler clamp and exhaust system part requirements.
References
- "Automotive Exhaust Systems: Design, Components, and Maintenance" - A general automotive repair manual that provides in - depth information about exhaust systems.
- Manufacturer's instructions for muffler clamps and related parts.
Send Inquiry