

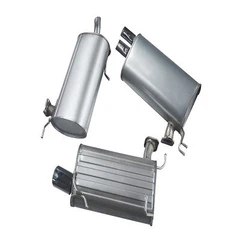
How to adjust the position of the rear muffler for 2013 Nissan Teana 2.0L?
Oct 22, 2025
Leave a message
Adjusting the position of the rear muffler on a 2013 Nissan Teana 2.0L is a task that requires careful attention and a basic understanding of the vehicle's exhaust system. As a supplier of rear mufflers for the 2013 Nissan Teana 2.0L, I've encountered various situations where proper adjustment is crucial. In this blog, I'll guide you through the process of adjusting the rear muffler's position, ensuring optimal performance and a smooth driving experience.
Understanding the Rear Muffler's Role
Before delving into the adjustment process, it's essential to understand the role of the rear muffler in your vehicle. The rear muffler is a critical component of the exhaust system, responsible for reducing the noise produced by the engine's exhaust gases. It also helps to improve the overall performance of the engine by ensuring a smooth flow of exhaust gases. A properly positioned rear muffler can prevent excessive noise, vibrations, and potential damage to other exhaust components.


Tools and Materials Needed
To adjust the position of the rear muffler on your 2013 Nissan Teana 2.0L, you'll need the following tools and materials:
- Jack and jack stands: These are essential for safely lifting the vehicle and providing stable support.
- Socket set: You'll need a socket set to remove and reinstall the bolts that secure the rear muffler.
- Pliers: Pliers can be used to remove any clamps or hangers that may be holding the muffler in place.
- Rubber mallet: A rubber mallet can be used to gently tap the muffler into position.
- Safety glasses and gloves: It's important to protect your eyes and hands during the adjustment process.
Step-by-Step Adjustment Process
- Prepare the Vehicle
- Park your 2013 Nissan Teana 2.0L on a flat, level surface and engage the parking brake.
- Open the hood and locate the battery. Disconnect the negative terminal to prevent any electrical shocks.
- Place wheel chocks in front of and behind the front wheels to prevent the vehicle from rolling.
- Lift the Vehicle
- Use a jack to lift the rear of the vehicle until the rear wheels are off the ground.
- Place jack stands under the vehicle's frame for additional support. Make sure the jack stands are properly positioned and secure.
- Locate the Rear Muffler
- The rear muffler is located at the rear of the vehicle, underneath the trunk. It's connected to the exhaust pipe by a series of bolts and hangers.
- Inspect the muffler and its connections for any signs of damage or wear. If you notice any cracks, holes, or loose connections, it may be necessary to replace the muffler or its components.
- Remove the Rear Muffler
- Use a socket set to remove the bolts that secure the rear muffler to the exhaust pipe.
- If there are any clamps or hangers holding the muffler in place, use pliers to remove them.
- Carefully lower the rear muffler from the vehicle and place it on a clean, flat surface.
- Inspect the Exhaust Pipe and Hangers
- While the rear muffler is removed, inspect the exhaust pipe and hangers for any signs of damage or wear. If you notice any cracks, holes, or loose connections, it may be necessary to repair or replace the exhaust pipe or hangers.
- Check the alignment of the exhaust pipe and make sure it's straight and free of any bends or kinks.
- Adjust the Position of the Rear Muffler
- Place the rear muffler back under the vehicle and align it with the exhaust pipe.
- Use a rubber mallet to gently tap the muffler into position. Make sure the muffler is centered and evenly spaced from the exhaust pipe.
- Check the alignment of the muffler's hangers and make sure they're properly positioned and secure.
- Reinstall the Rear Muffler
- Once the rear muffler is properly positioned, reinstall the bolts that secure it to the exhaust pipe.
- If there are any clamps or hangers, reinstall them using pliers.
- Make sure all the bolts and clamps are tightened securely.
- Lower the Vehicle
- Use a jack to lower the vehicle back to the ground.
- Remove the jack stands and wheel chocks.
- Reconnect the negative terminal of the battery.
- Test Drive the Vehicle
- Start the engine and let it run for a few minutes. Listen for any unusual noises or vibrations.
- Take the vehicle for a test drive and pay attention to the exhaust noise and performance. If you notice any issues, stop the vehicle and inspect the rear muffler and its connections.
Common Issues and Solutions
- Excessive Noise: If you notice excessive noise coming from the exhaust system after adjusting the rear muffler, it may be due to a loose connection or improper alignment. Check the bolts and clamps to make sure they're tightened securely. If the noise persists, it may be necessary to replace the rear muffler or its components.
- Vibrations: Vibrations in the exhaust system can be caused by a loose connection, improper alignment, or a damaged muffler. Check the bolts and clamps to make sure they're tightened securely. If the vibrations persist, it may be necessary to replace the rear muffler or its components.
- Leaking Exhaust: If you notice a leak in the exhaust system, it may be due to a cracked or damaged muffler. Inspect the muffler for any signs of damage or wear. If you find a crack or hole, it may be necessary to replace the rear muffler or its components.
Other Related Mufflers
In addition to the rear muffler for the 2013 Nissan Teana 2.0L, we also supply a variety of other high-quality mufflers. For example, we offer the Center Muffler For Toyota FJ CRUISER, which is designed to provide excellent noise reduction and performance for your Toyota FJ CRUISER. We also have the Rear Muffler for 2020 Toyota Corolla, which is specifically engineered to fit the 2020 Toyota Corolla and enhance its exhaust system. And if you own a 2013 Nissan Tiida, our Center Muffler for 2013 Nissan Tiida is a great choice to improve the performance and sound of your vehicle.
Conclusion
Adjusting the position of the rear muffler on your 2013 Nissan Teana 2.0L is a relatively simple process that can be done with basic tools and a little patience. By following the steps outlined in this blog, you can ensure that your rear muffler is properly positioned, reducing noise, vibrations, and potential damage to other exhaust components. If you have any questions or need further assistance, please don't hesitate to contact us. We're here to help you find the right rear muffler for your 2013 Nissan Teana 2.0L and ensure a smooth and enjoyable driving experience. Whether you're a professional mechanic or a DIY enthusiast, we're committed to providing you with high-quality products and excellent customer service. Contact us today to discuss your rear muffler needs and explore our wide range of options.
References
- Nissan Teana 2.0L Owner's Manual
- Automotive Repair Manuals
Send Inquiry